Phidias Tutorial · 3 minutes
How to Log Into TradingView With Your Phidias Account
If you already chart on TradingView, you can route your Phidias account through the Tradovate broker integration and execute directly from your charts. No second platform, no separate broker connection. This guide walks you through the exact flow on web and desktop.
Browse the Phidias account lineup →
What you need before you start
- An active Phidias account (Express to Live, Fundamental, or Premium).
- The Tradovate agreements signed (one-time, takes 2 minutes — guide here if not done yet).
- Your Tradovate credentials, found inside your Phidias dashboard under the NinjaTrader Account window.
- A TradingView account (free works) on web or desktop.
A lot of futures traders live inside TradingView. Phidias 2.0 lets you keep that workflow without switching platforms to place orders. The integration runs through Tradovate, which acts as the broker connection inside TradingView. Once your Phidias account is linked, you trade from your TradingView chart and the orders hit your Phidias account.
Two prerequisites matter. First, you must have signed the Tradovate market data and license agreements once. If you have not, do that first using the Tradovate login guide. It takes two minutes and unlocks every platform that uses your Tradovate credentials. Second, your Phidias dashboard holds your username and password under the NinjaTrader Account section. Keep that tab open, you will need it.
Step 1 — Sign the one-time Tradovate agreements
Open your Phidias dashboard. At the top you will see a section called NinjaTrader Account. Click Tradovate Web. This opens the Tradovate web app, where the first-time agreements are signed. It does not matter if you plan to trade on NinjaTrader, TradingView, or the Tradovate web app itself, this step is mandatory once per account.

Inside the Tradovate web app you will be prompted to do three things in order:
- Market Data Subscriber Certification — confirm Nonprofessional. By default it is usually set to Nonprofessional already, but if it shows Professional, switch it. This matters because the wrong selection triggers a different fee structure.
- Uniform Subscriber Agreement — tick I have read and agree, then type your name in the electronic signature field exactly as it appears just above the field. Capitalisation, spacing, accents, all of it. Click Sign and wait for the confirmation message.
- Tradovate License Agreement — a long-form legal text. Scroll through and click Accept at the bottom.
If you want the granular walkthrough of the Tradovate agreements, the dedicated guide is here. You only do this once per account.
Step 2 — Open TradingView (web or desktop)
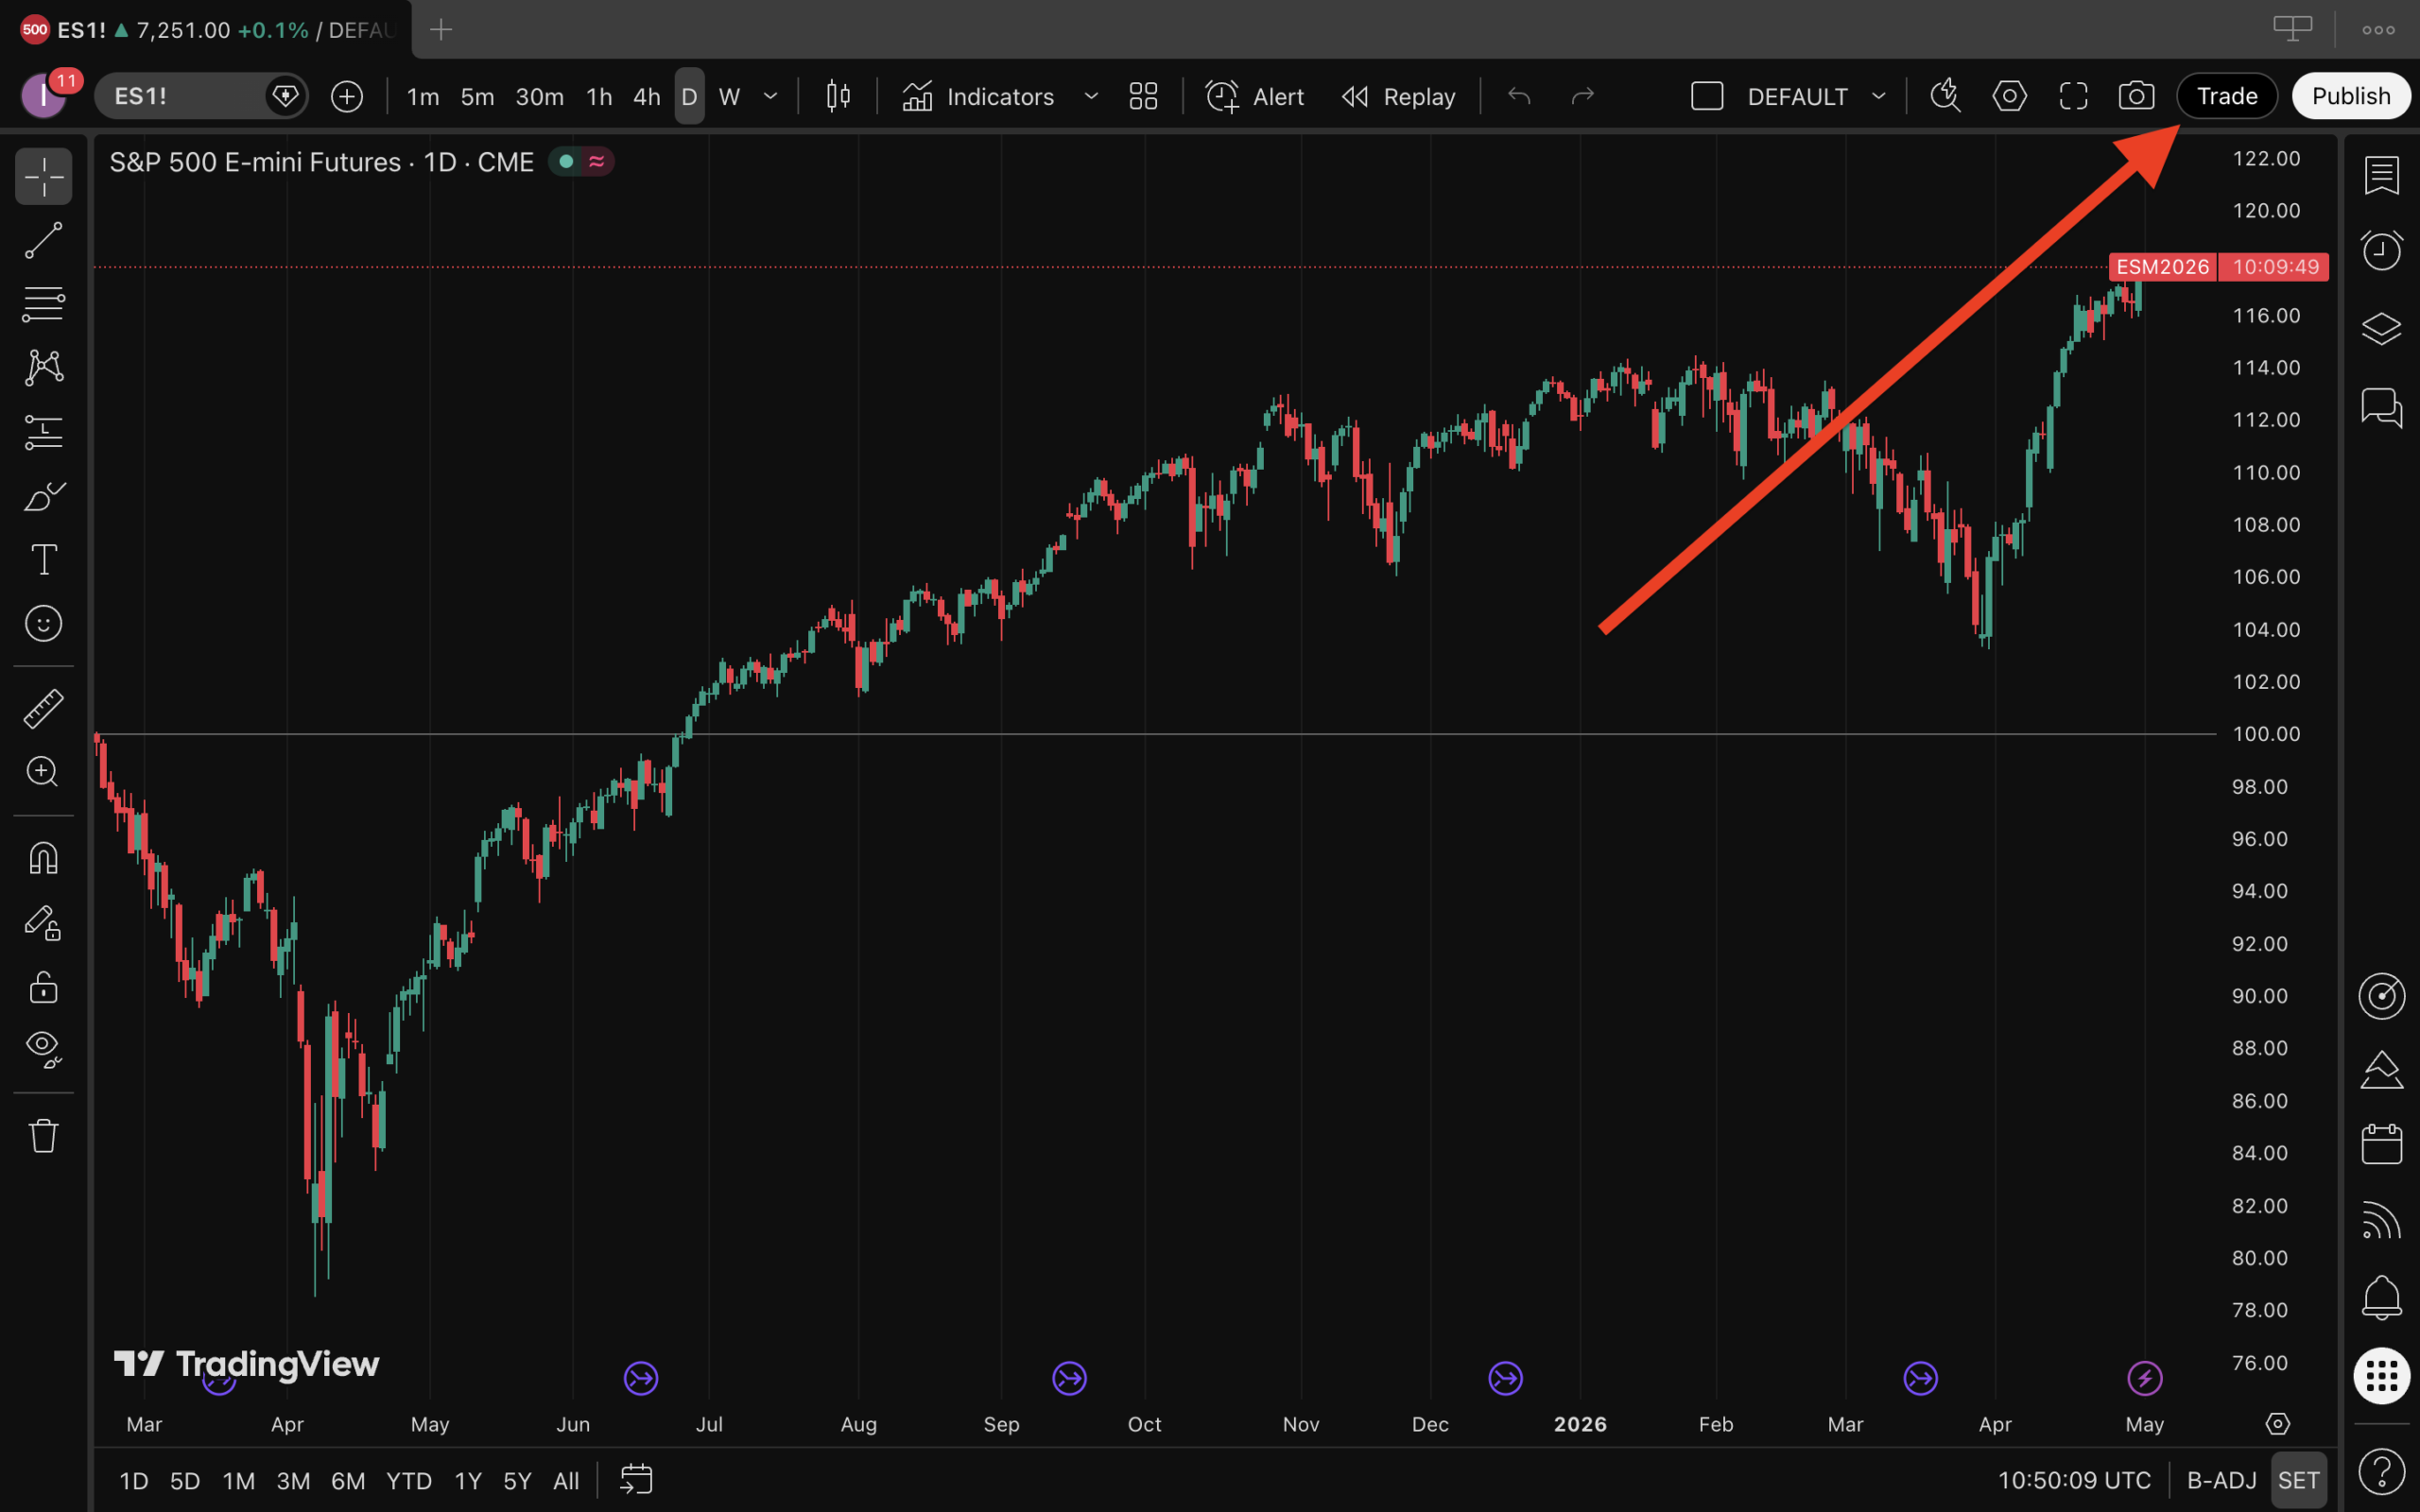
Open TradingView. Either the web version at tradingview.com or the desktop app, both work the same way for this. Pull up the chart of any contract you want to trade. As an example, the video uses the ES (E-mini S&P 500). By default the data shown is delayed unless you have an active TradingView market data subscription. The connection to Tradovate handles execution. Live data is a separate subscription you can buy directly from TradingView if you want it.
Step 3 — Click Trade in the upper right corner
In the upper right of the TradingView interface, click the Trade button. This opens the broker selection panel where you can connect TradingView to your execution provider.
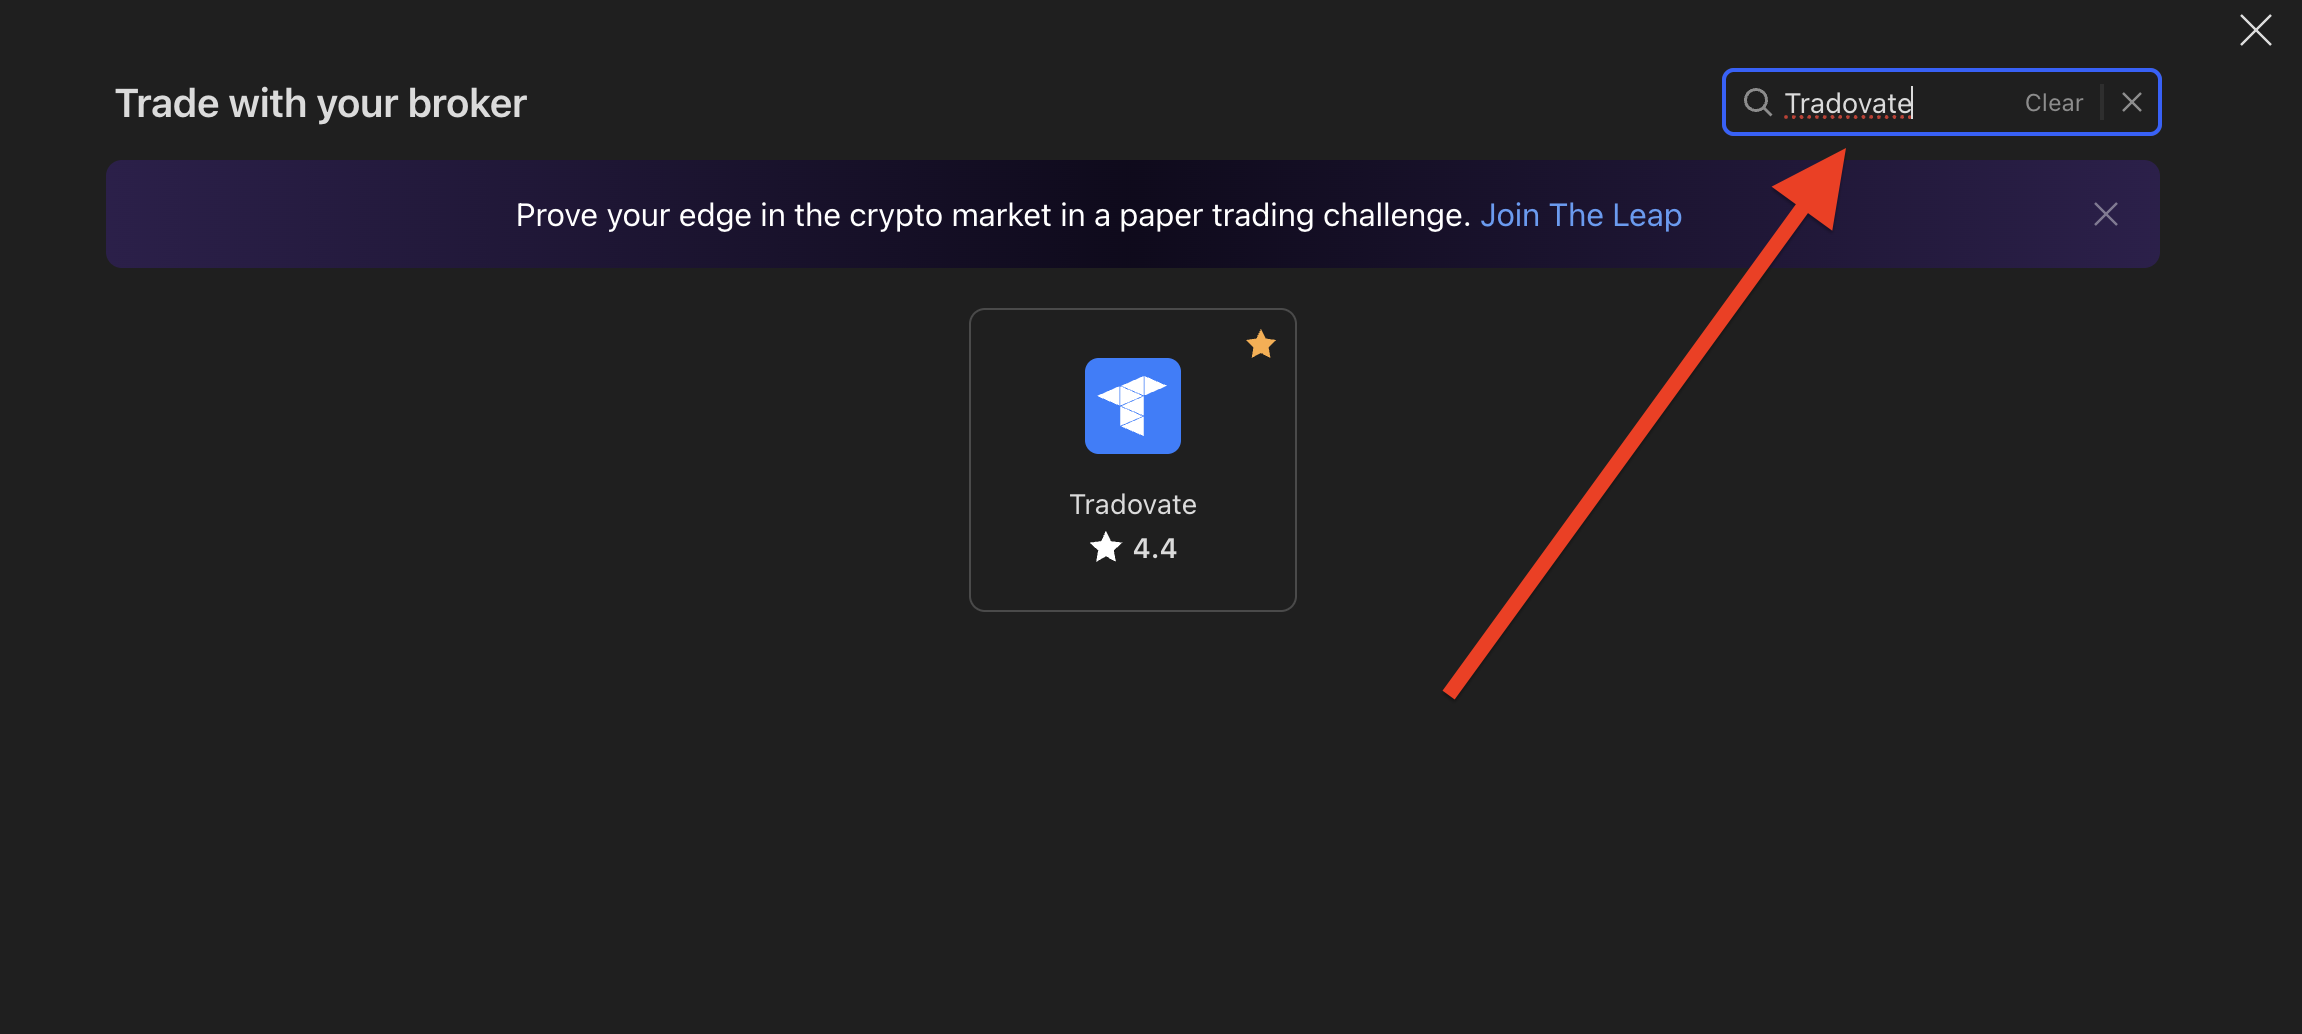
Step 4 — Search for Tradovate in the broker list
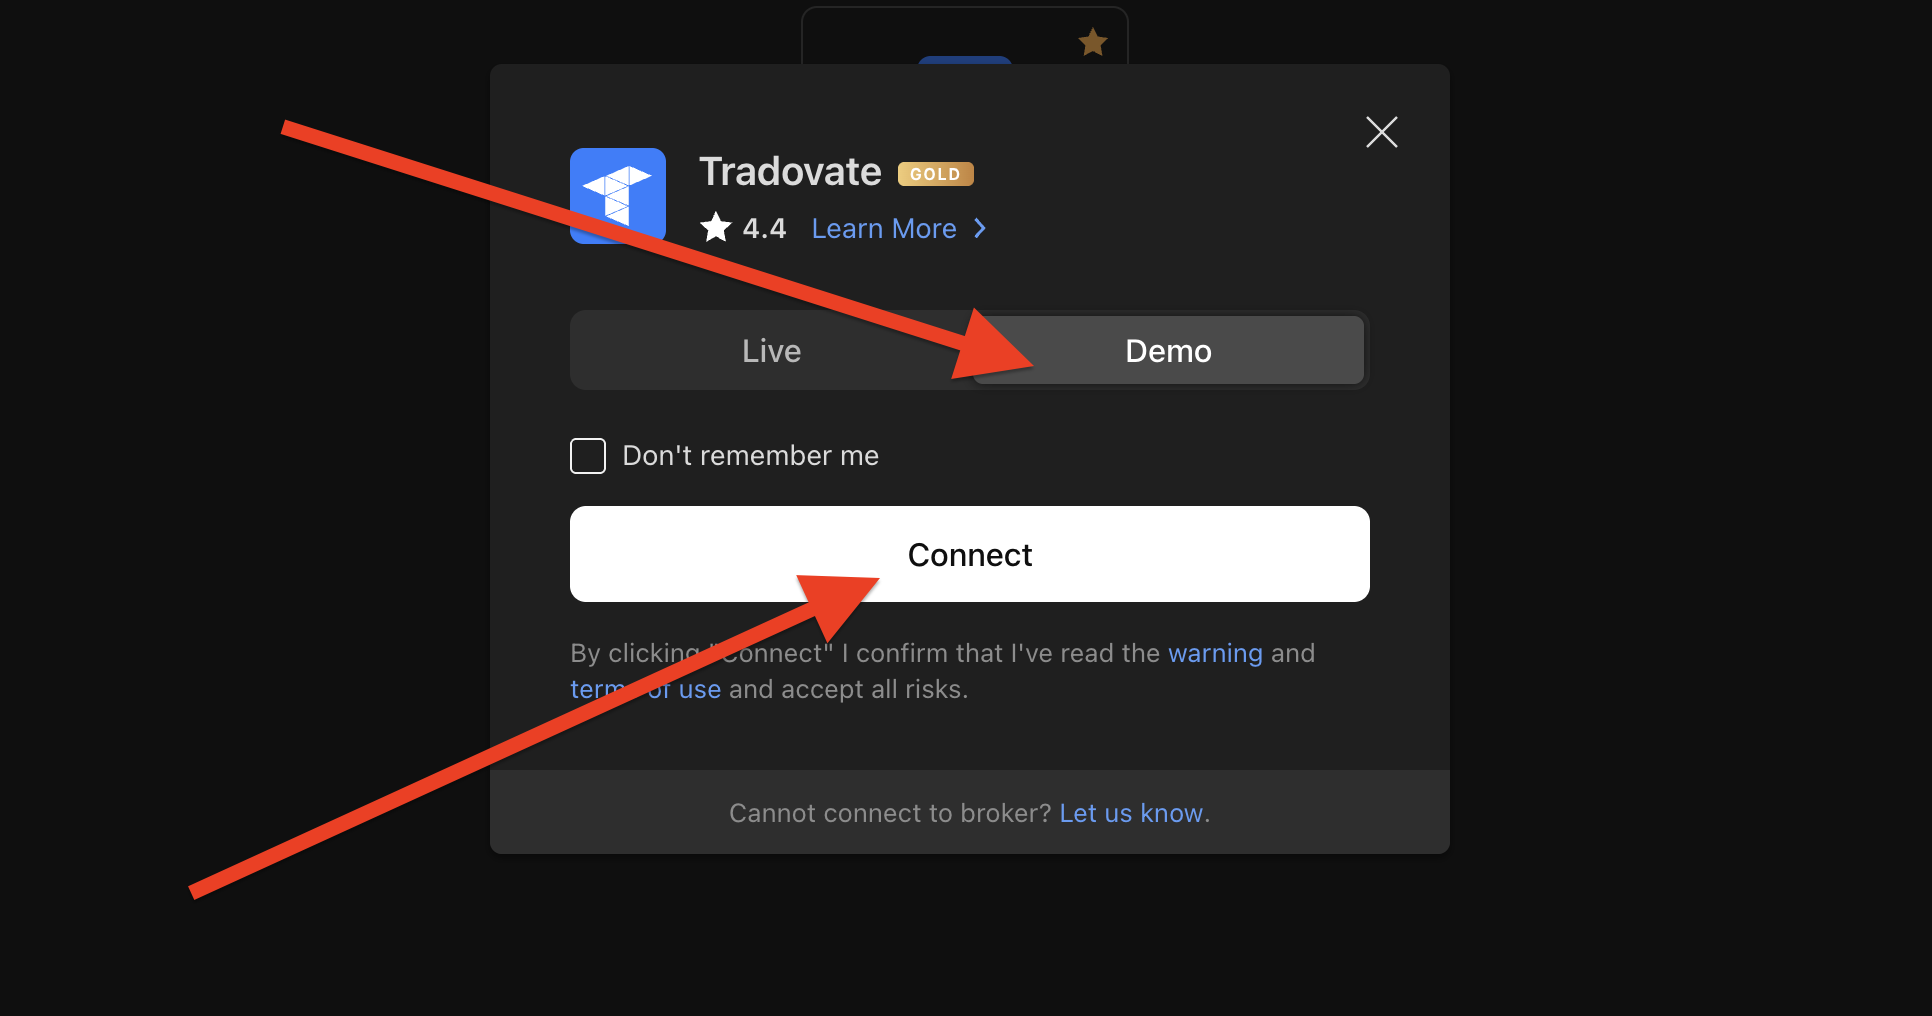
A broker selection list appears. Use the search field and type Tradovate. You will see two entries: Live and Demo. For your Phidias evaluation account, choose Demo. The Phidias funded environment runs on Tradovate’s simulation engine, so the Demo connection is the correct one. Click Connect.
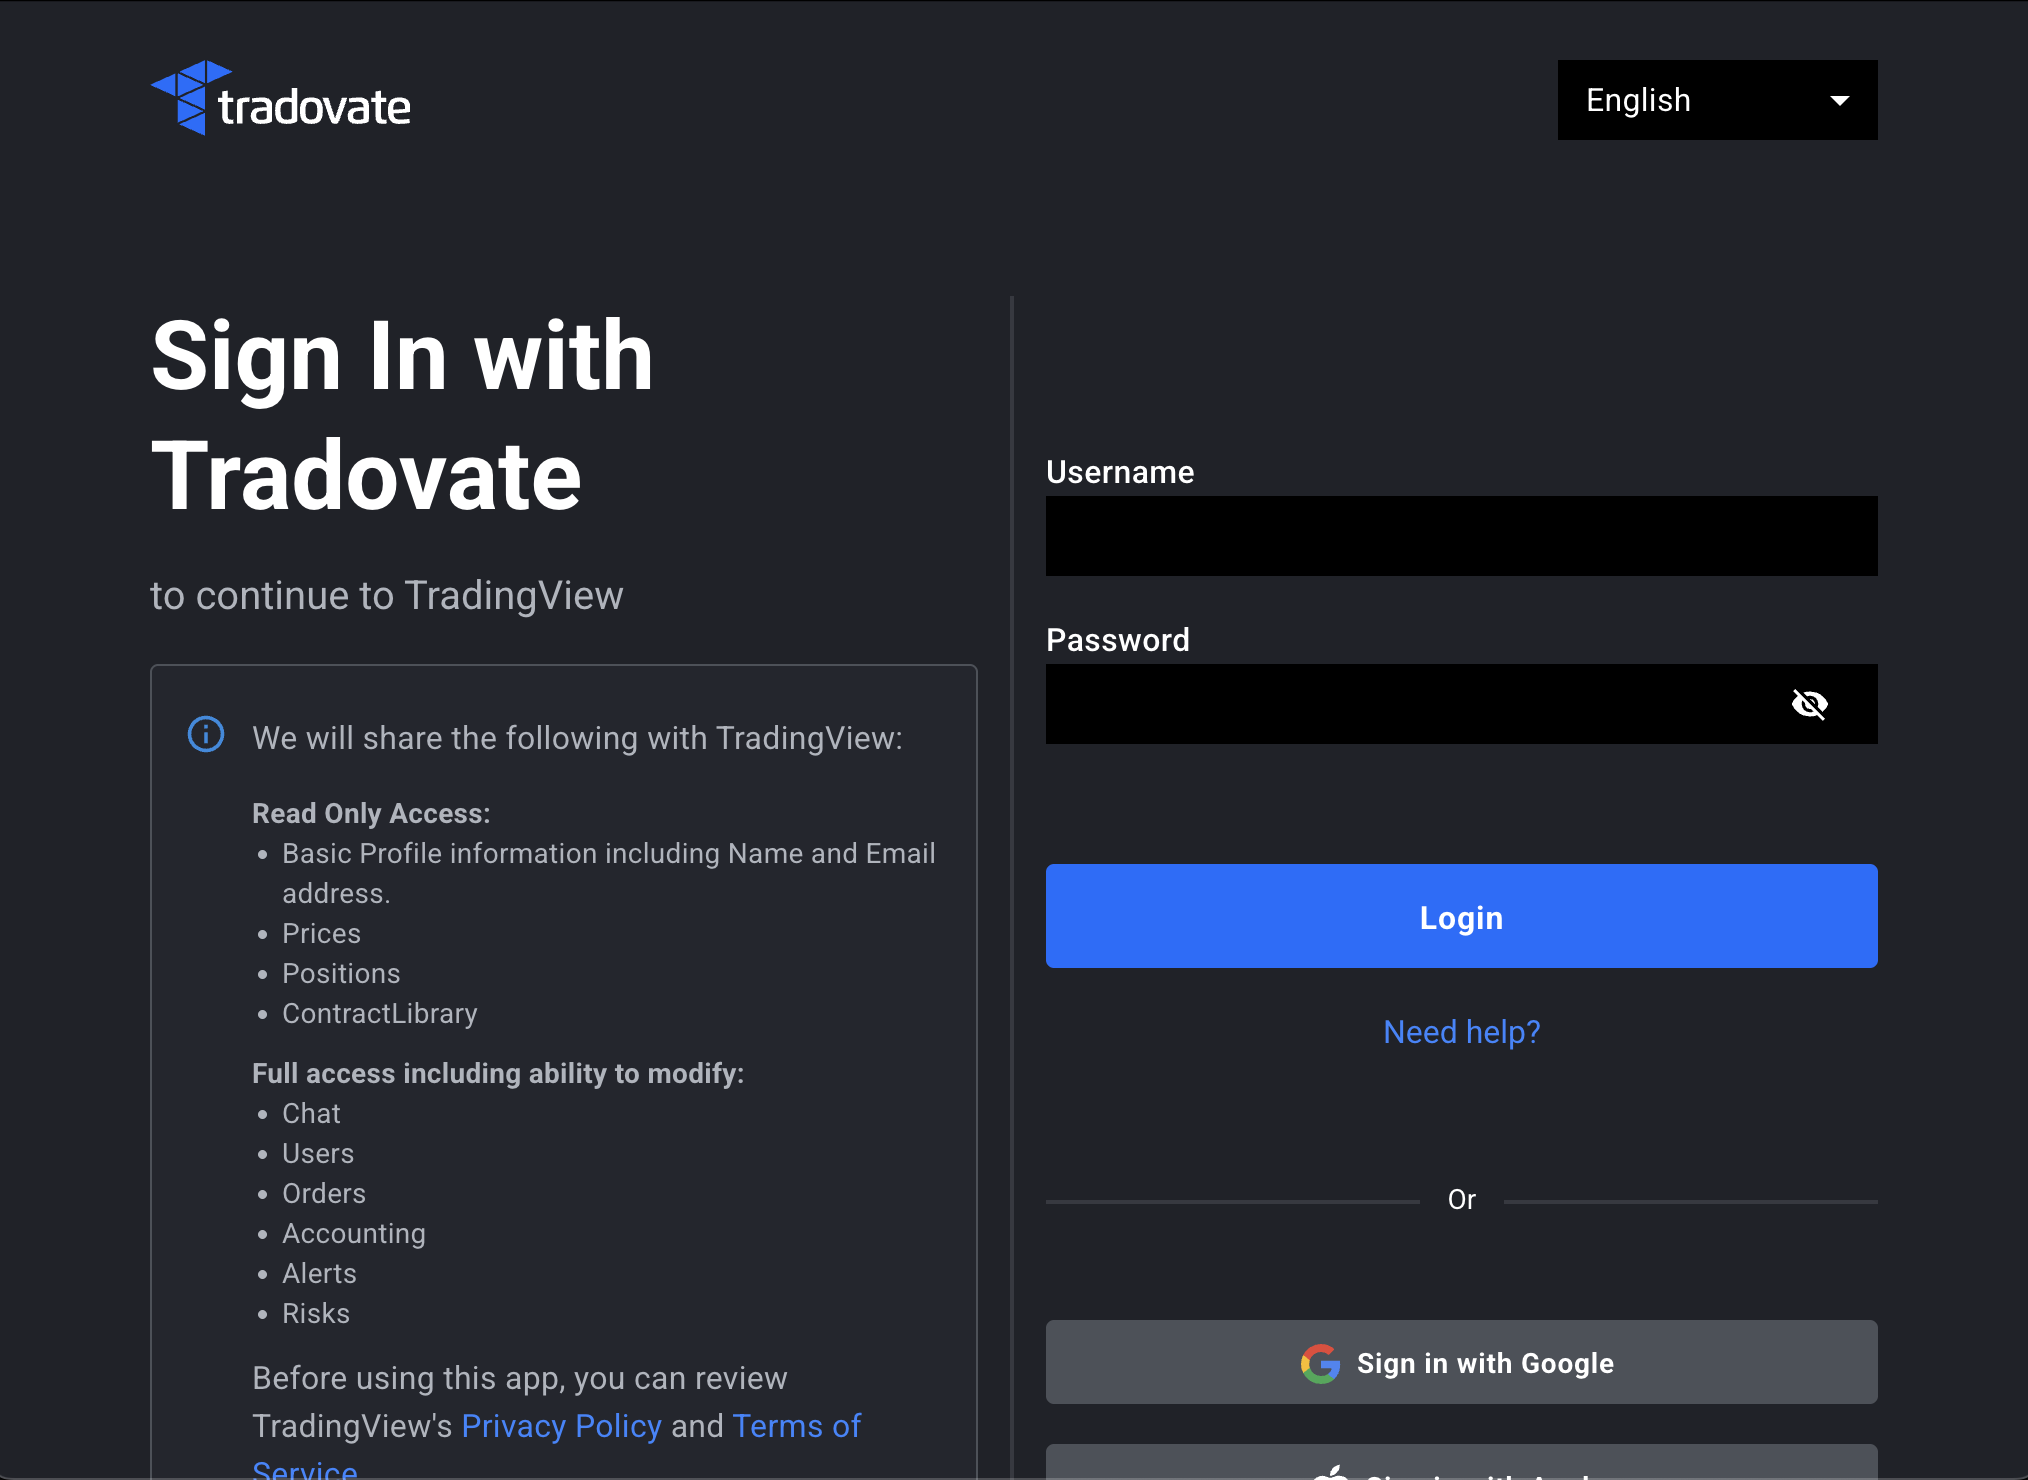
Step 5 — Enter your Phidias credentials and log in
A Tradovate login window opens inside TradingView. Enter the username and password from your Phidias dashboard NinjaTrader Account section. These are the same credentials that opened Tradovate web in the first place. Click Login. TradingView verifies the connection and the license, then drops you back into the chart with the broker connected.
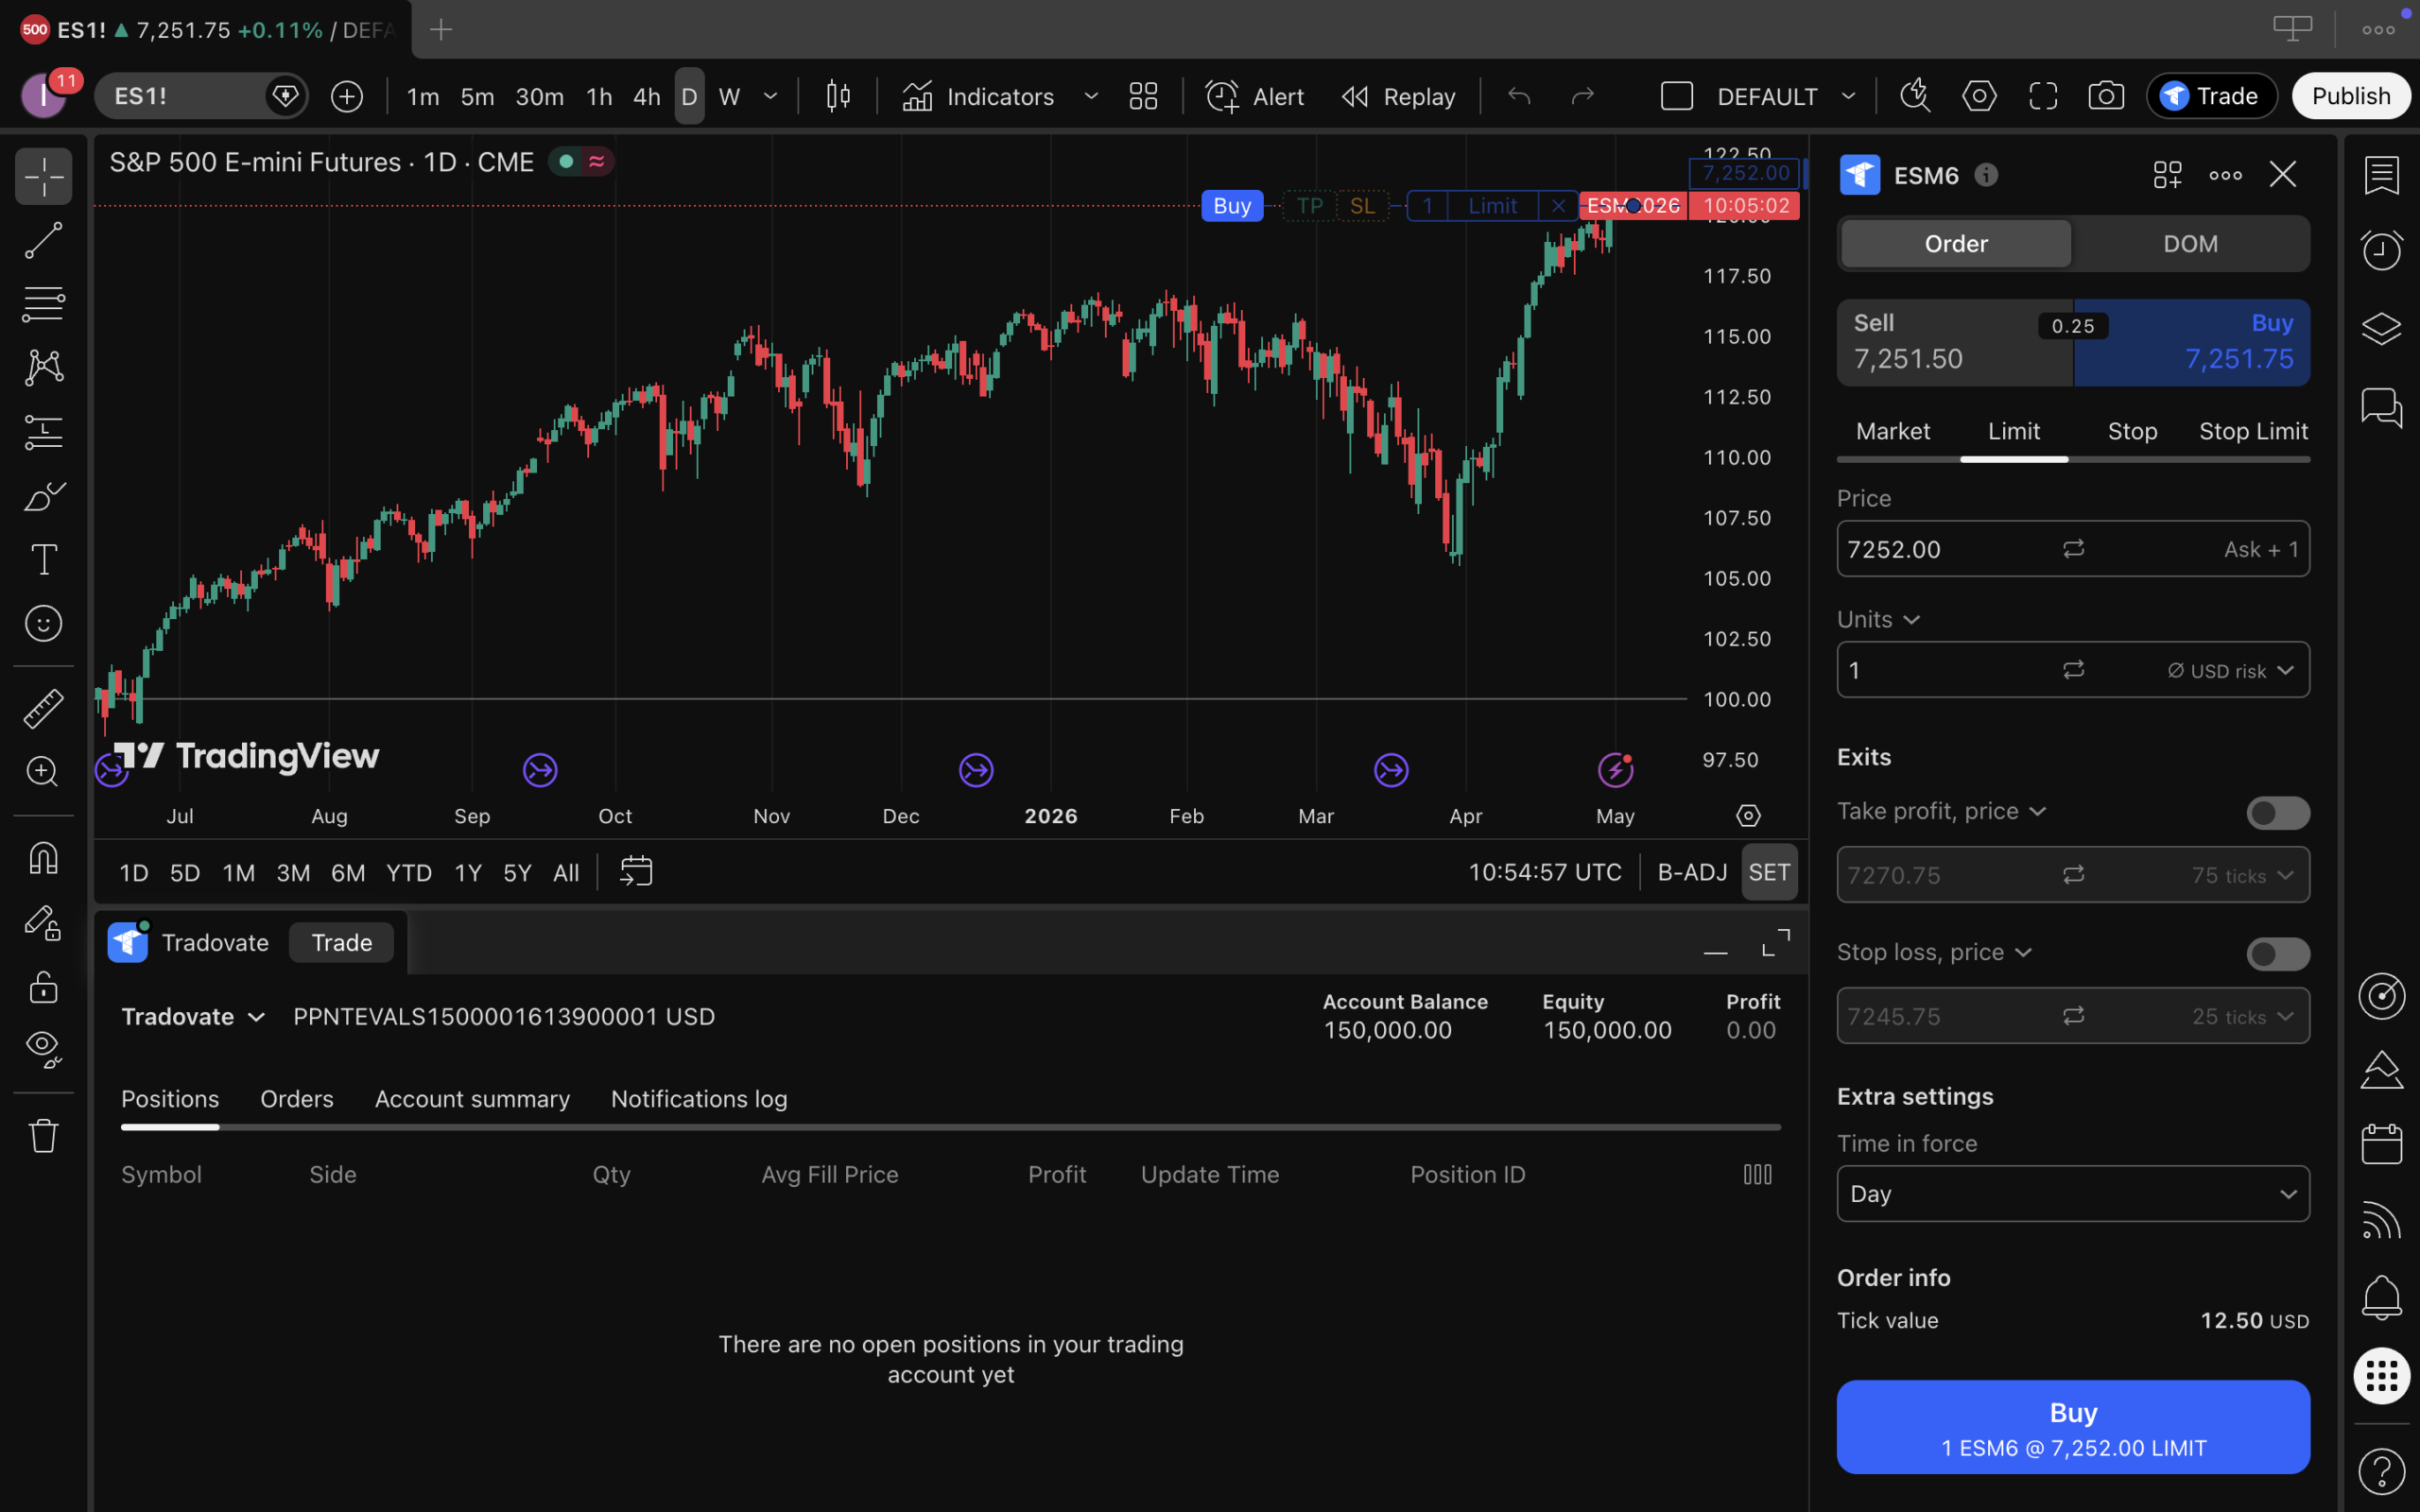
Step 6 — Confirm the connection and start trading
After login, the Tradovate symbol appears at the top of the TradingView interface. To verify you are on the right account, open the bottom panel of TradingView. You will see your trading account balance, your equity, and your live PnL pulled directly from Tradovate. From here, every order you place from the chart hits your Phidias account.
A note on live market data
By default TradingView shows delayed data. The Tradovate connection handles your execution, not your data feed. If you want live data inside TradingView, you need to buy a market data subscription directly from TradingView for the exchanges you trade. Your Phidias execution still works on delayed data, but live data improves your decision speed.
Common mistakes and how to fix them
“My credentials are rejected when I try to connect”
The most common cause is that the Tradovate agreements have not been signed yet. Open the Tradovate web app from your Phidias dashboard once, complete the agreements, then come back to TradingView. Full Tradovate login guide here.
“I selected Tradovate Live instead of Demo”
Disconnect and reconnect with the Demo entry. Phidias funded accounts run on Tradovate’s simulation engine, which TradingView lists as Demo. Live is for personal Tradovate brokerage accounts, not prop firm accounts.
“My charts say data is delayed”
That is TradingView’s default behaviour. The Tradovate connection handles execution, not the chart data feed. If you want live data, buy the relevant exchange data subscription directly from TradingView.
“I connected but I cannot see my account at the bottom”
Open the bottom panel manually if it is collapsed. Click the small arrow at the bottom of the TradingView interface to expand the trading panel. Your account balance, equity, and PnL will appear.
Companion tutorials
Your Phidias credentials work across every supported platform. Here are the other guides.
- How to log into Tradovate with your Phidias account — the first-time agreements step required for everyone.
- How to log into NinjaTrader with your Phidias account — for traders who prefer the desktop platform.
Ready to add another account?
Browse Express to Live, Fundamental, and Premium.
Frequently asked questions
Can I trade my Phidias account from TradingView?
Yes. Phidias supports Tradovate as a broker connection inside TradingView. After signing the one-time Tradovate agreements, you connect TradingView to Tradovate Demo using your Phidias credentials and place orders directly from your TradingView chart.
Do I need a paid TradingView account?
No. The free TradingView account works for the broker connection. A paid TradingView plan is only needed if you want extra chart features or live market data subscriptions for specific exchanges.
Why do I select Tradovate Demo instead of Live?
Phidias funded prop accounts run on Tradovate’s simulation environment. Inside TradingView’s broker list, that environment is labelled Demo. Live is reserved for personal Tradovate brokerage accounts. For Phidias, always select Demo.
Will I get live market data on TradingView through this connection?
No. The Tradovate broker connection handles execution. Market data inside TradingView is a separate subscription. By default you see delayed data. For live data, buy the corresponding exchange subscription from TradingView directly.
Can I switch between TradingView, NinjaTrader, and Tradovate web with the same Phidias account?
Yes. Your Tradovate credentials work across all three platforms. Sign the one-time agreements in the Tradovate web app, then use the same login on TradingView, NinjaTrader, the Tradovate web app, or the Tradovate mobile app interchangeably.
Where do I get my Phidias credentials for the TradingView login?
Inside the Phidias dashboard, open the section labelled NinjaTrader Account. Your Tradovate username and password are listed there. The same credentials apply to TradingView through the Tradovate broker connection.